> ## Documentation Index
> Fetch the complete documentation index at: https://docs.salesvoicesai.com/llms.txt
> Use this file to discover all available pages before exploring further.
# LinkedIn App Setup
> This document provides instructions on correctly setting up a LinkedIn application so that users can log in/register via LinkedIn on your site.
## Creating a new app
You need to create a LinkedIn app to allow users to log in to your site with their LinkedIn accounts. To create a new LinkedIn app, please do the following:
* Go to the LinkedIn developer site: [https://developer.linkedin.com/](https://developer.linkedin.com/).
* Click the “Create App” button on the banner.
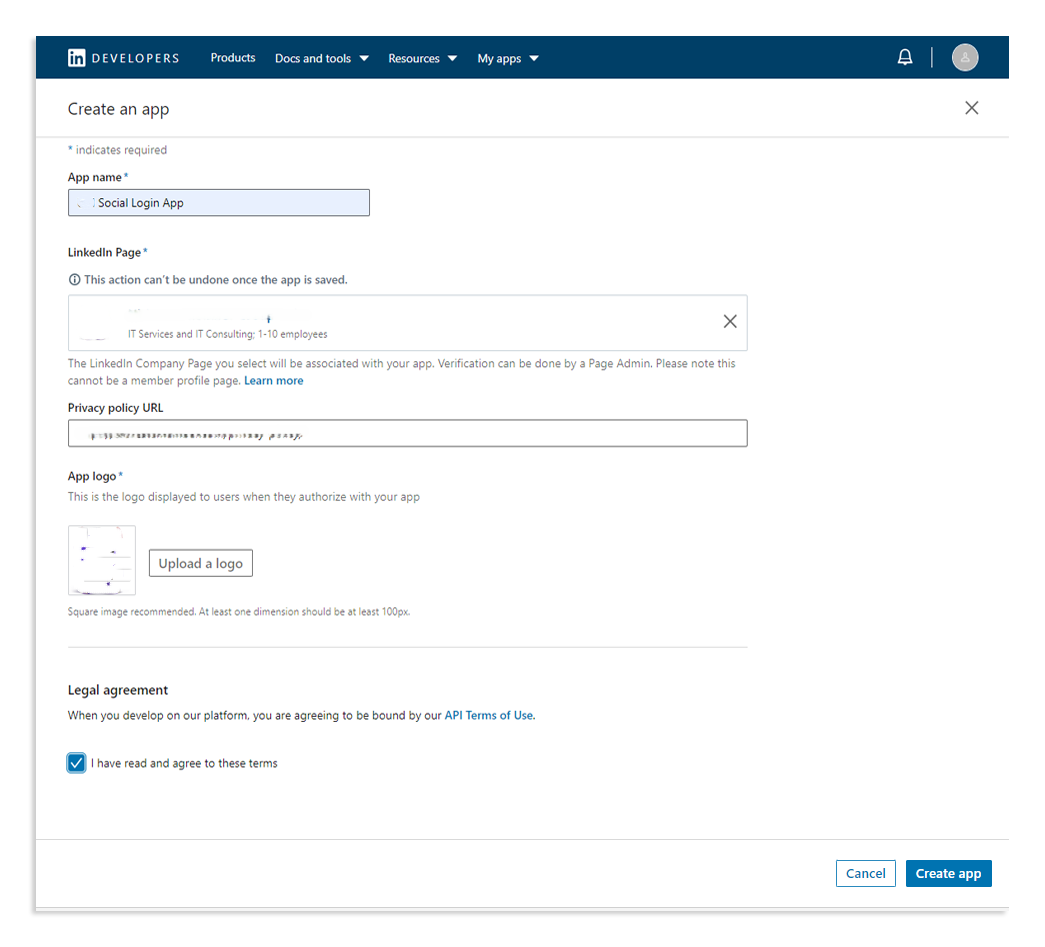
* To correctly create the application, please fill in the application sections, which are explained below.
## Create an app
* **Application Name** – Enter a name for your application.
* **Company name** – Select an existing company or choose a New Company. If you select the new company, you will be asked to enter a company name.
* **Description** – Enter a name for your application.
* **Business Email** – Enter your email address.
* **Legal terms** – Read the terms of service and check the box to confirm that you have read and agree to the terms.
Click the project button in the top menu and you'll see the **Select a project** pop-up. Click the **NEW PROJECT** button create a project.
 ## Products
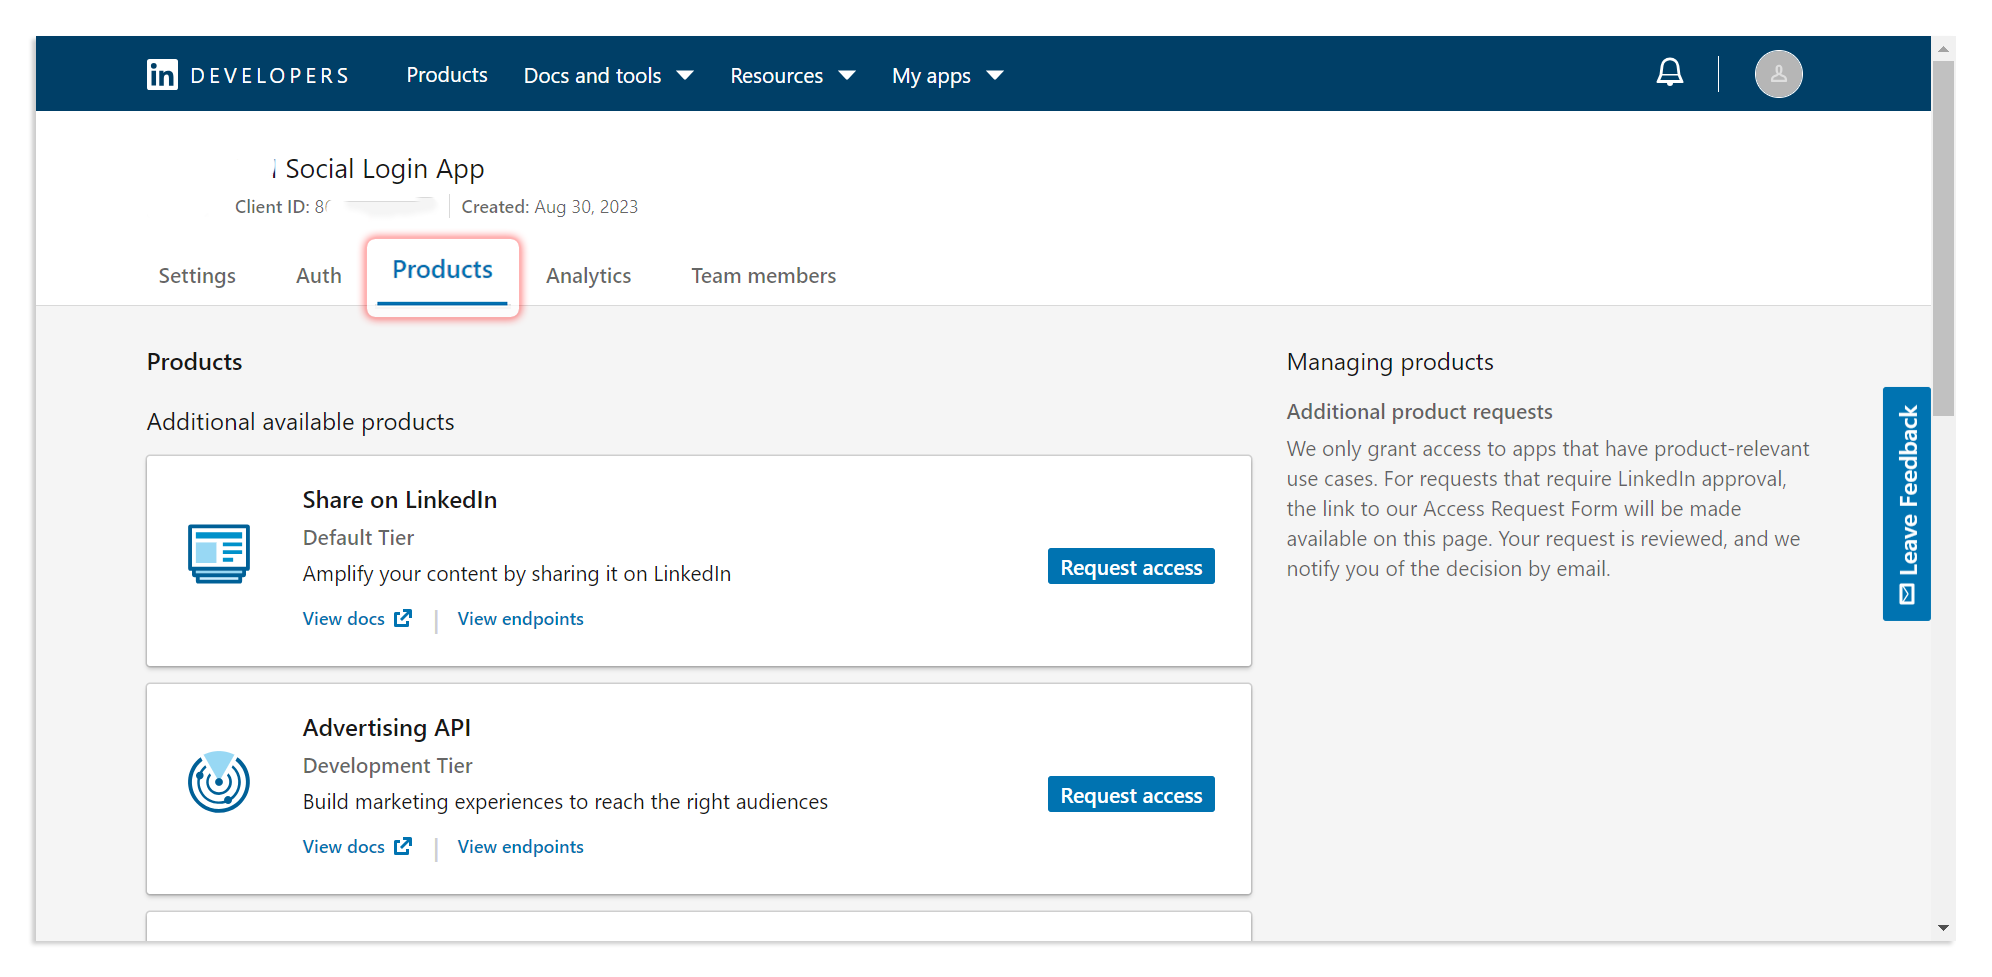
Once you have clicked on the **Create app** button, you'll be redirected to the Products tab.
## Products
Once you have clicked on the **Create app** button, you'll be redirected to the Products tab.
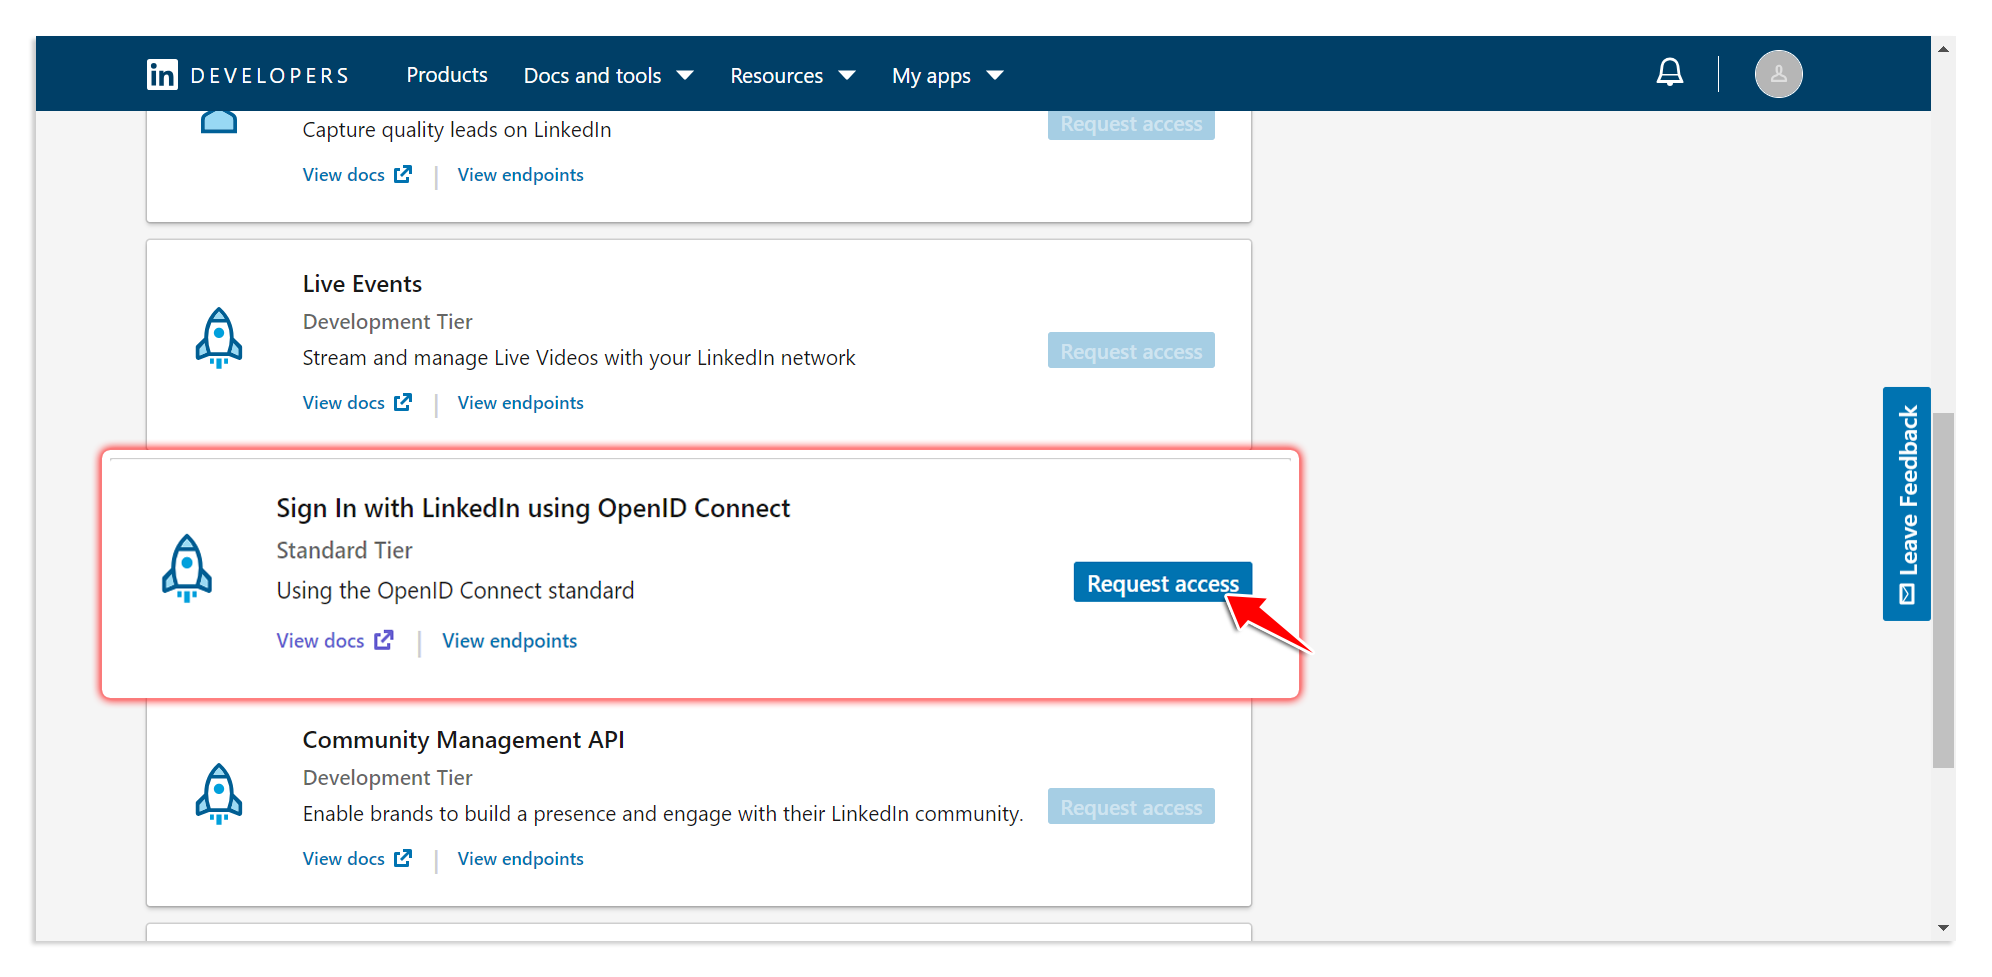
 Scroll down the product list until you find **Sign In with LinkedIn using OpenID Connect** and click the **Request Access** button.
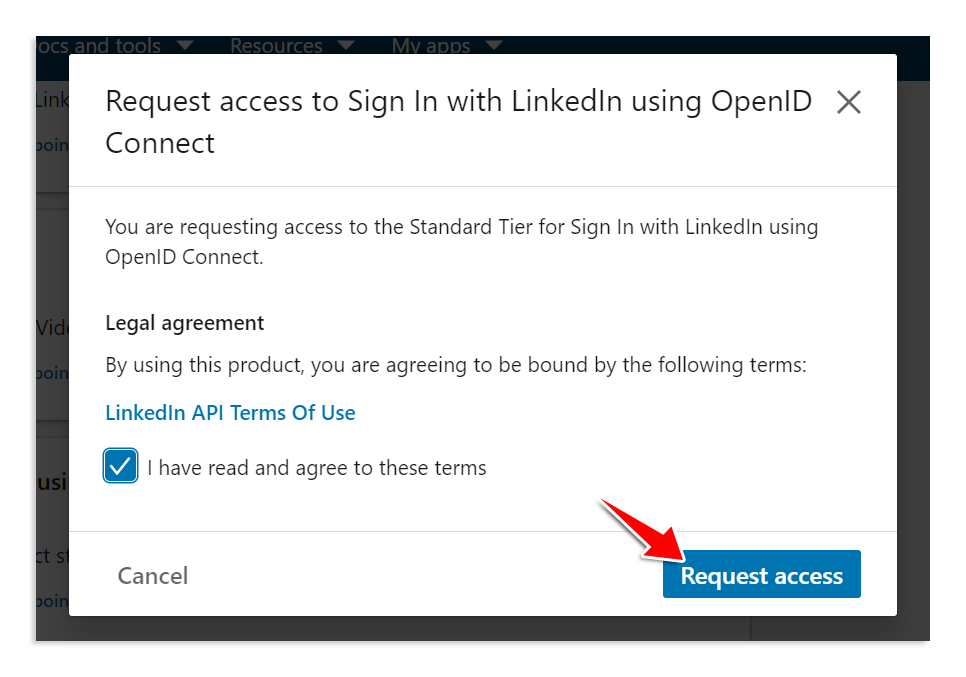
 Read the terms; if you agree with the terms, click on the checkbox and proceed by clicking on the **Request Access** button.
 ## Auth
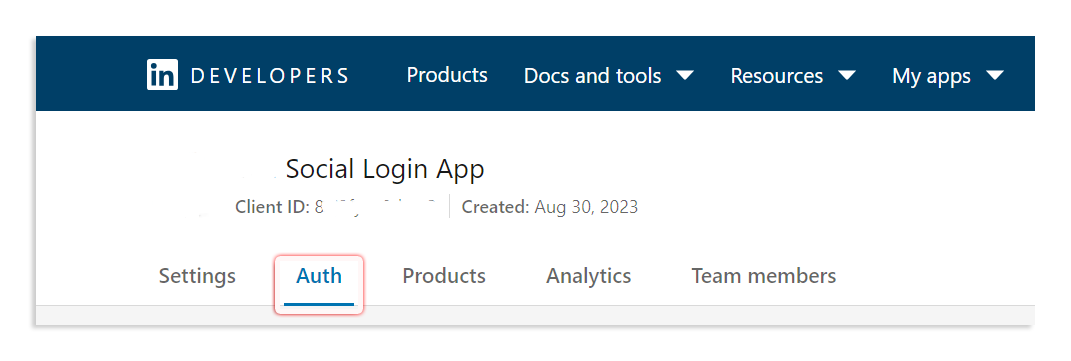
Go to the Auth tab and add Redirect URLs.
## Auth
Go to the Auth tab and add Redirect URLs.
 ## OAuth 2.0 settings
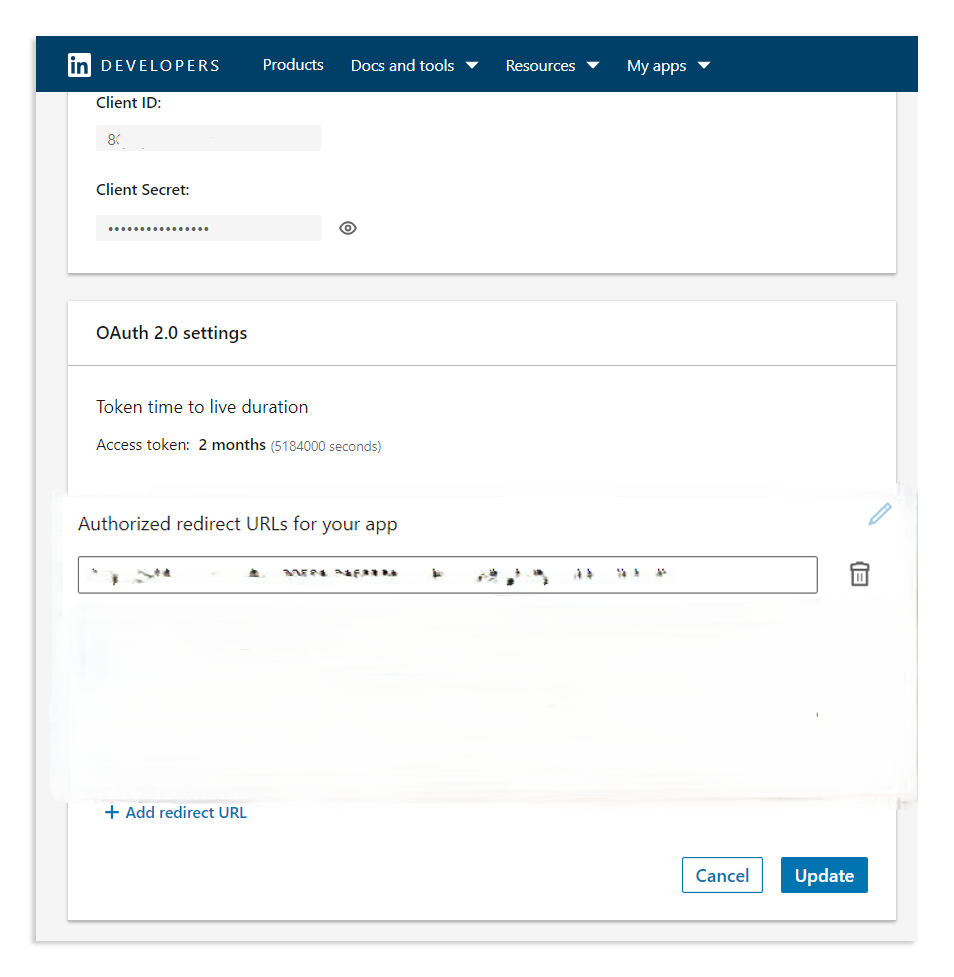
In the redirects URLs, you just need to enter your site e.g.: [https://sss.com/login/linkedin-openid/callback](https://sss.com/login/linkedin-openid/callback)
## OAuth 2.0 settings
In the redirects URLs, you just need to enter your site e.g.: [https://sss.com/login/linkedin-openid/callback](https://sss.com/login/linkedin-openid/callback)
 ## Scopes
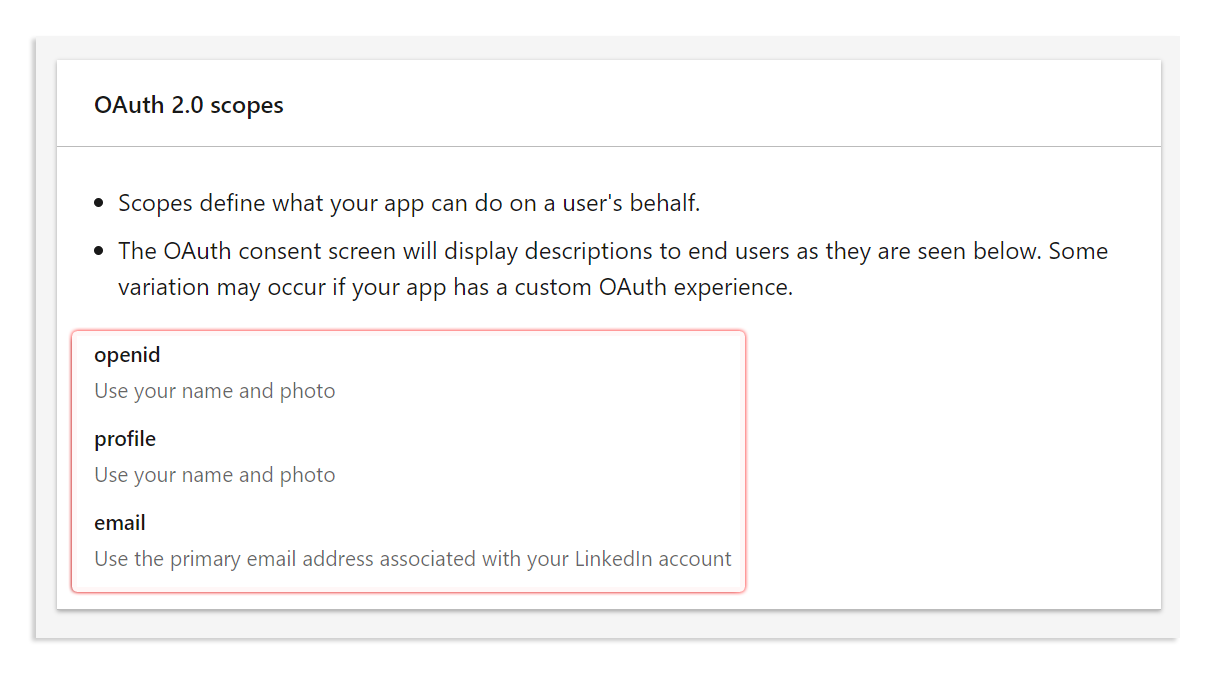
The OAuth 2.0 scopes will appear a few seconds after you have added and updated the redirect URLs in OAuth 2.0 Settings.
## Scopes
The OAuth 2.0 scopes will appear a few seconds after you have added and updated the redirect URLs in OAuth 2.0 Settings.
 ## Application details
If the app is successfully created, you will see the following details.
## Application details
If the app is successfully created, you will see the following details.
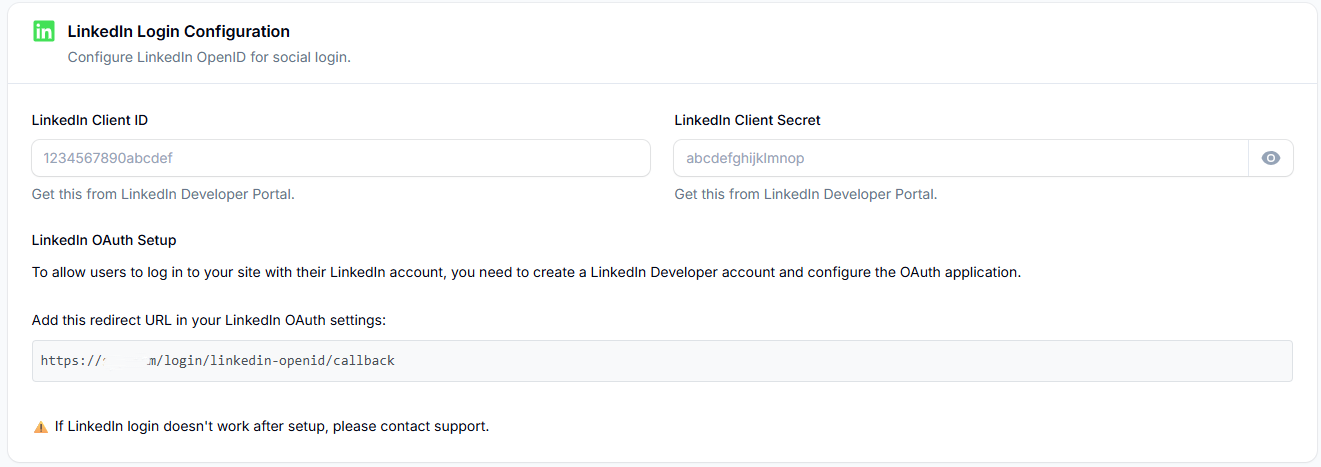
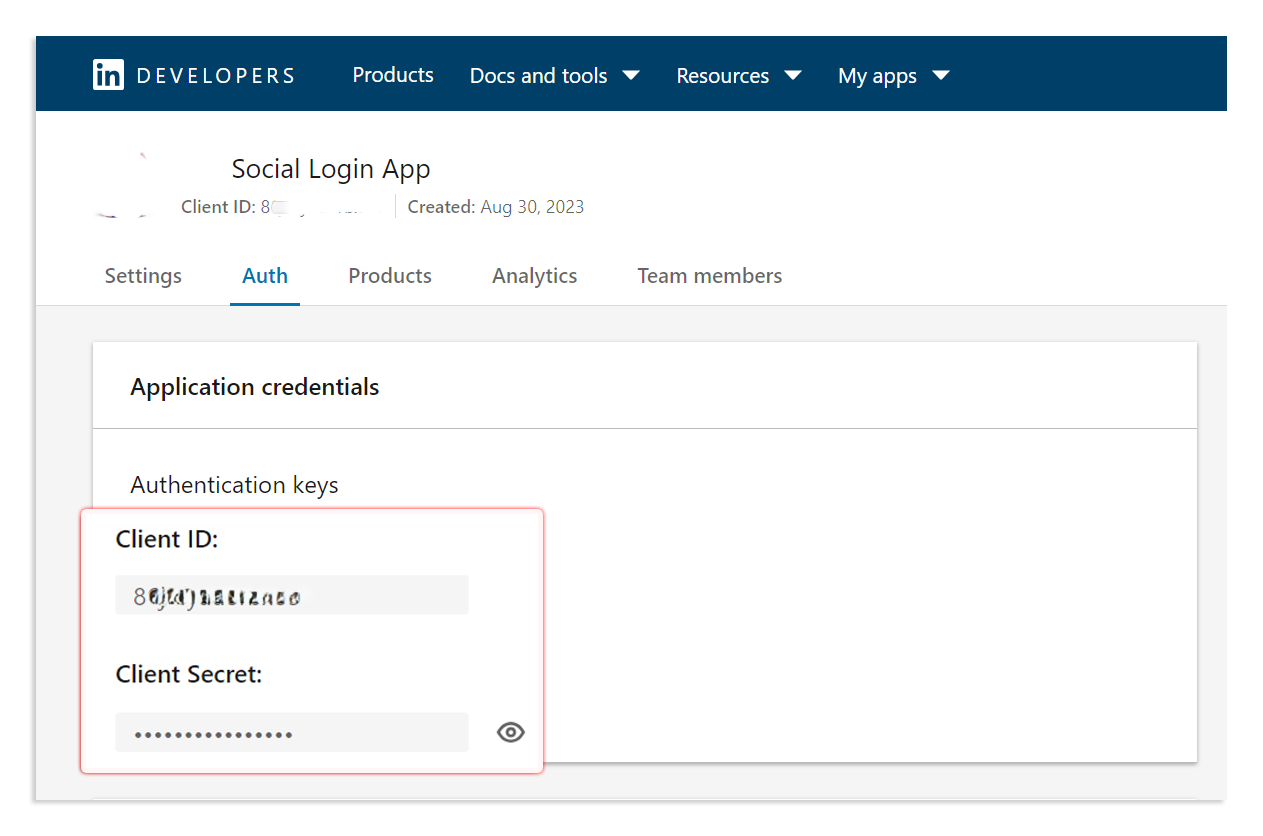 You will need to copy the **API Key** and **Secret Key** and add them to the white-label > Settings > Social Logins > LinkedIn Login Configuration.
 ***
**Need help?** Contact our support team for assistance with any step of the setup process.
***
**Need help?** Contact our support team for assistance with any step of the setup process.